Categories
Electronics PiDashCam Raspberry Pi

PiDashCam – Issues

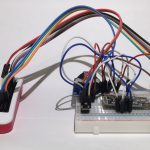
Well. That didn’t go to plan. I managed to hook the PiDashCam up to the car. It powered on fine, and has recorded, however I forgot to change the settings and it recorded in 10 second blocks. I also mounted it incorrectly, so it sort of sat at an angle. I also went out when it was a bit dark so the images are really not great. The worst part, however, is that the Raspberry Pi Zero didn’t seem to grab the time from the RTC Module. I’ll need to do some digging and figure out exactly where its all went wrong…

Very cropped side by side

The camera, although a lower resolution, appears to capture more of the image. Its a shame it appears very hard to see properly, but I’m hoping thats to do with the camera_mode, or possibly the sensor. More tinkering required!

I’ve also been thinking about having a simple way to change the camera_mode when recording. I think I’m going too implement a 3 LED system, using Binary counting, so show which camera_mode I’m using. I’ve have a (very) quick look at Alex Eames code for button presses here and think I can change this so that a quick press is camera_mode, a longer press is stop recording (useful for when I have it hooked up in the house to view files instead of running pkill every time I log in), and a long press is shutdown. Ultimately the first press can be used as a “protect” marker on files should it be required, but I’m getting ahead of myself!

# The following Python code has been copied from https://github.com/raspitv/bikedashcam/blob/master/dashcamcorder.py - Alex Eames and Raspi.tv


try:
    while True:
          # this will run until button on GPIO13 is pressed, then
          #   if pressed short,     stop recording
          #   if pressed long,      close program
          #   if pressed very long, shutdown Pi gracefully
        print "Waiting for button press"
        GPIO.wait_for_edge(13, GPIO.FALLING)
        print "Stop button pressed"
        stop_recording()

          # poll GPIO 13 bottom button at 20 Hz for 3 seconds
          # if still pressed at the end of that time period, shut down
          # if released at all, break
        for i in range(60):
            if GPIO.input(13):
                break
            sleep(0.05)

        if 25 <= i < 58:              # if released between 1.25 & 3s close prog
            print "Closing program"
            GPIO.cleanup()
            sys.exit()

        if not GPIO.input(13):
            if i >= 59:
                shutdown()
Categories
Electronics GitHub PiDashCam Raspberry Pi

An Update…

So, after being alerted by the Raspberry Pi Weekly mailing list to a liveblog by Alex Eames detailing his process for building a biking “dash cam” I thought I better start detailing what I’ve done, what I’m currently doing, and what I plan to do with my PiDashCam project which has taken a back seat for a number of months years. I’ve watched the videos Alex has made, but not yet looked at the code. My first post was using an Original Raspberry Pi with no camera attached, hooked up to a GPS module to ensure I got valid GPS data, and a small SPI screen so I could view the data

The Before

Unfortunately work and life took over and apart from spending a few odd minutes here and there over a number of months, no real advances were made apart from this update in which I was now testing with the Raspberry Pi Zero W, and figuring out how to get it talking to the GPS module, with the accelerometer, button and RGB LED all hooked up (but still no camera).

The After

I’m now going to try and update here with that I’ve decided upon, some new design goals and design directions, and the code needed to run my PiDashCam, in addition to stripping back to the bare essentials (you know, like being a camera).

I’ve remained with the Raspberry Pi Zero Wireless and I have an RTC Module hooked up, in addition to the camera, and one button. At present, the Pi boots, and automatically runs two scripts.

The new, updated, lesser qualified PiDashCam

The first, record.py, grabs the date and time, starts the camera, and starts recording, updating the annotated text on the screen. It then outputs a new file named after the current year, month, day, hour, minute and second (YYMMDDHHMMSS) every pre-determined number of seconds (roughly). You will be able to view this source code on GitHub as soon as I get round to uploading it. It also annotates the current date and time, and the current camera_mode.

The second, start.py, simply waits for the button press. At present it only detects an on push, nothing fancy like a multiple second hold. It then gracefully pkills the Python Process that is controlling the camera and after a few seconds delay, initiates a shut down of the Pi.

As its a bit unwieldily at present, I’ve stuck and blu-tacked it to a cheap dash camera I bought from eBay or AliExpress at some point or another. 

The camera works when testing in my house. I’ve still to take it a road test and make sure it works. I have a second, cheap Dash Cam that was another eBay or AliExpress special that does what it needs to do, but the quality is pretty poor. I plan on keeping both cameras connected and comparing the output. If I cant at least match the quality of a sub £20 Dash Cam then there’s no real point in continuing this one.

My Plan is as follows

  1. Test the camera, make sure it works in the car
  2. QUALITY CHECK
  3. Test multiple camera modes with the First Edition Raspberry Pi Camera
  4. Test multiple camera modes with the Second Edition Raspberry Pi Camera
  5. Test multiple camera modes with a cheap FishEye Pi Camera
  6. QUALITY CHECK
  7. Add in GPS Logging
  8. Add second button for marking of emergency record
  9. Add in G-Sensor for additional annotation and Emergency Record Function
  10. QUALITY CHECK
  11. Create a settings style file where all user-selectable settings are set
  12. Put it all in a nice case
  13. Work out a way to convert the raw h264 files to a usable mp4 format
  14. Build a nice web-based interface with an API so that apps can access the files/settings via Wi-fi
  15. Integrate with the CAN-Bus to take car data for better analysis of driving etc.

After each quality check, if the quality is not something that is useful then it could be a cancellation of the project. I’m trying to provide a more organised, and focused attempt this time and having these Design Goals will ensure that I focus on what’s required without jumping ahead. As always, I’m a great started and terrible finisher, but hopefully that will change!

In addition to the PiDashCam, I’m Aldo going to try my had again at small electronics. I’ve had a plate of 100 of these WS8211B RGB LED’s, and due to the way I stored them, they managed to snap. Playing about with the layout meant I could resonable build a Binary Clock, which I’ve wanted to do for quite a while. Given how many I had though, I figured I could extend this out and make it alternate between a Binary and Regular clock, and seeing as I have an ESP8266 spare, this could all be controlled wirelessly, with the time updated from an NTP server. But, there will be a separate blog post about that!


Updated 20/02/2019 with correct links to Alex Eames blog and minor technical details.

Categories
Electronics GitHub PiDashCam Raspberry Pi

Pi Zero W – PiDashCam Part 2

There will be a longer post about the newly released Pi Zero W, however suffice to say as soon as I saw it was available it was ordered, and I now have one!

There has been a few changes to the PiDashCam project, which has included moving to the Pi Zero when v1.3 was released (As it had a camera connector on the board). I missed my opportunity to write about those updates!

The Pi Zero W uses a similar set up to the Pi 3, in that the built-in bluetooth capabilities use the hardware UART, which means that my UART GPS receiver wont work.

As it is so similar to the Pi 3 (excluding the memory and processor) the current Device Tree for disabling bluetooth on the Pi 3 works for the Pi Zero W.

I’ve included some code below. This starts from a fresh install and allows you to use the hardware UART of the Pi Zero W and disables bluetooth on that board.

I hope it helps someone! (Also, feel free to replace vi with nano – I’m trying to teach myself Vim).

sudo vi /boot/cmdline.txt

in this file, remove the following text:

console=serial0,115200

Save and close the file. Next up,

sudo vi /boot/config.txt

and add the following to the end of the file:

enable_uart=1
dtoverlay=pi3-disable-bt

Next, it’s these three quick commands which includes a reboot of the Pi Zero W, which enables hardware UART:

sudo systemctl stop [email protected]
sudo systemctl disable [email protected]
sudo reboot

To complete the GPS side of things however, continue with the following:

sudo apt-get install gpsd gpsd-clients python-gps
sudo systemctl stop gpsd.socket
sudo systemctl disable gpsd.socket

and finally,

sudo killall gpsd
sudo gpsd /dev/ttyAMA0 -F /var/run/gpsd.sock
cgps

which should see you getting data from the GPS Receiver.

Thanks to Adafruit for their existing tutorial, and the Raspberry Pi github/forums and IRC for the Device Tree information.